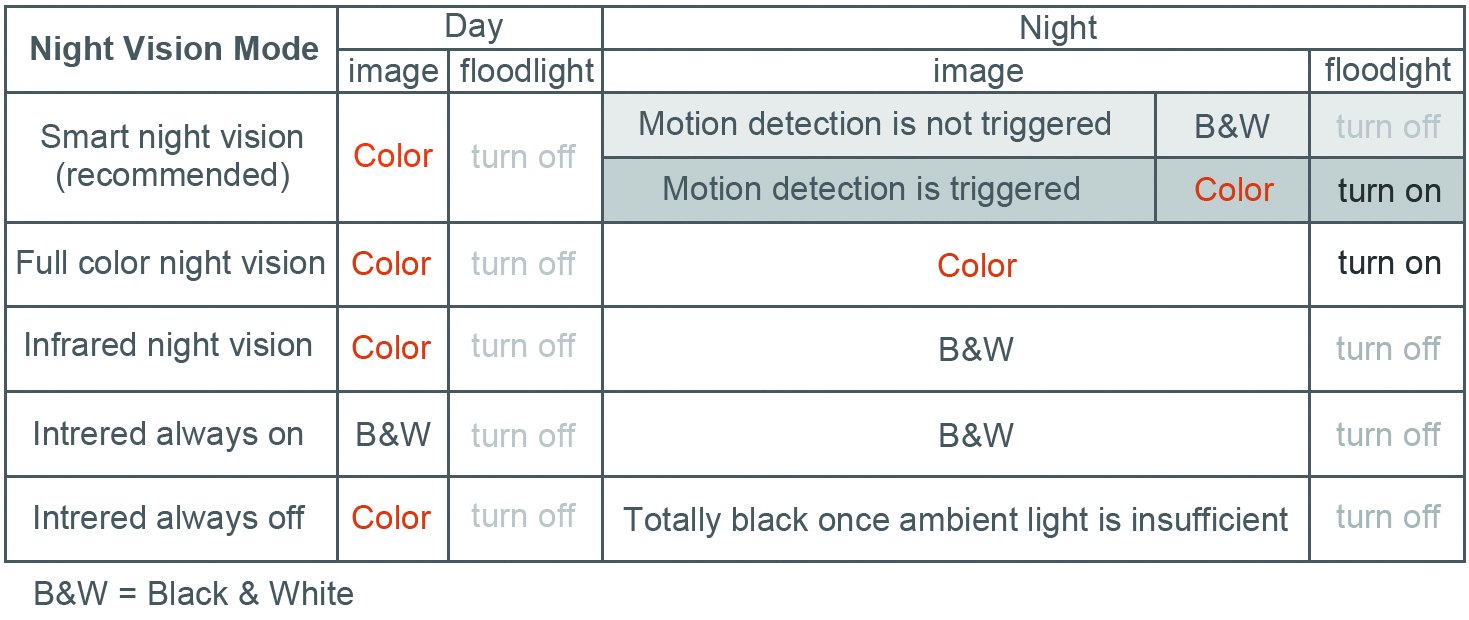
4. How to Add Camera to Camera System(NVR)?
The camera can be added to the Cromorc camera system or used alone with APP.
Note: Make sure your NVR is connected to the same router(Internet) of the camera for Wireless Add.
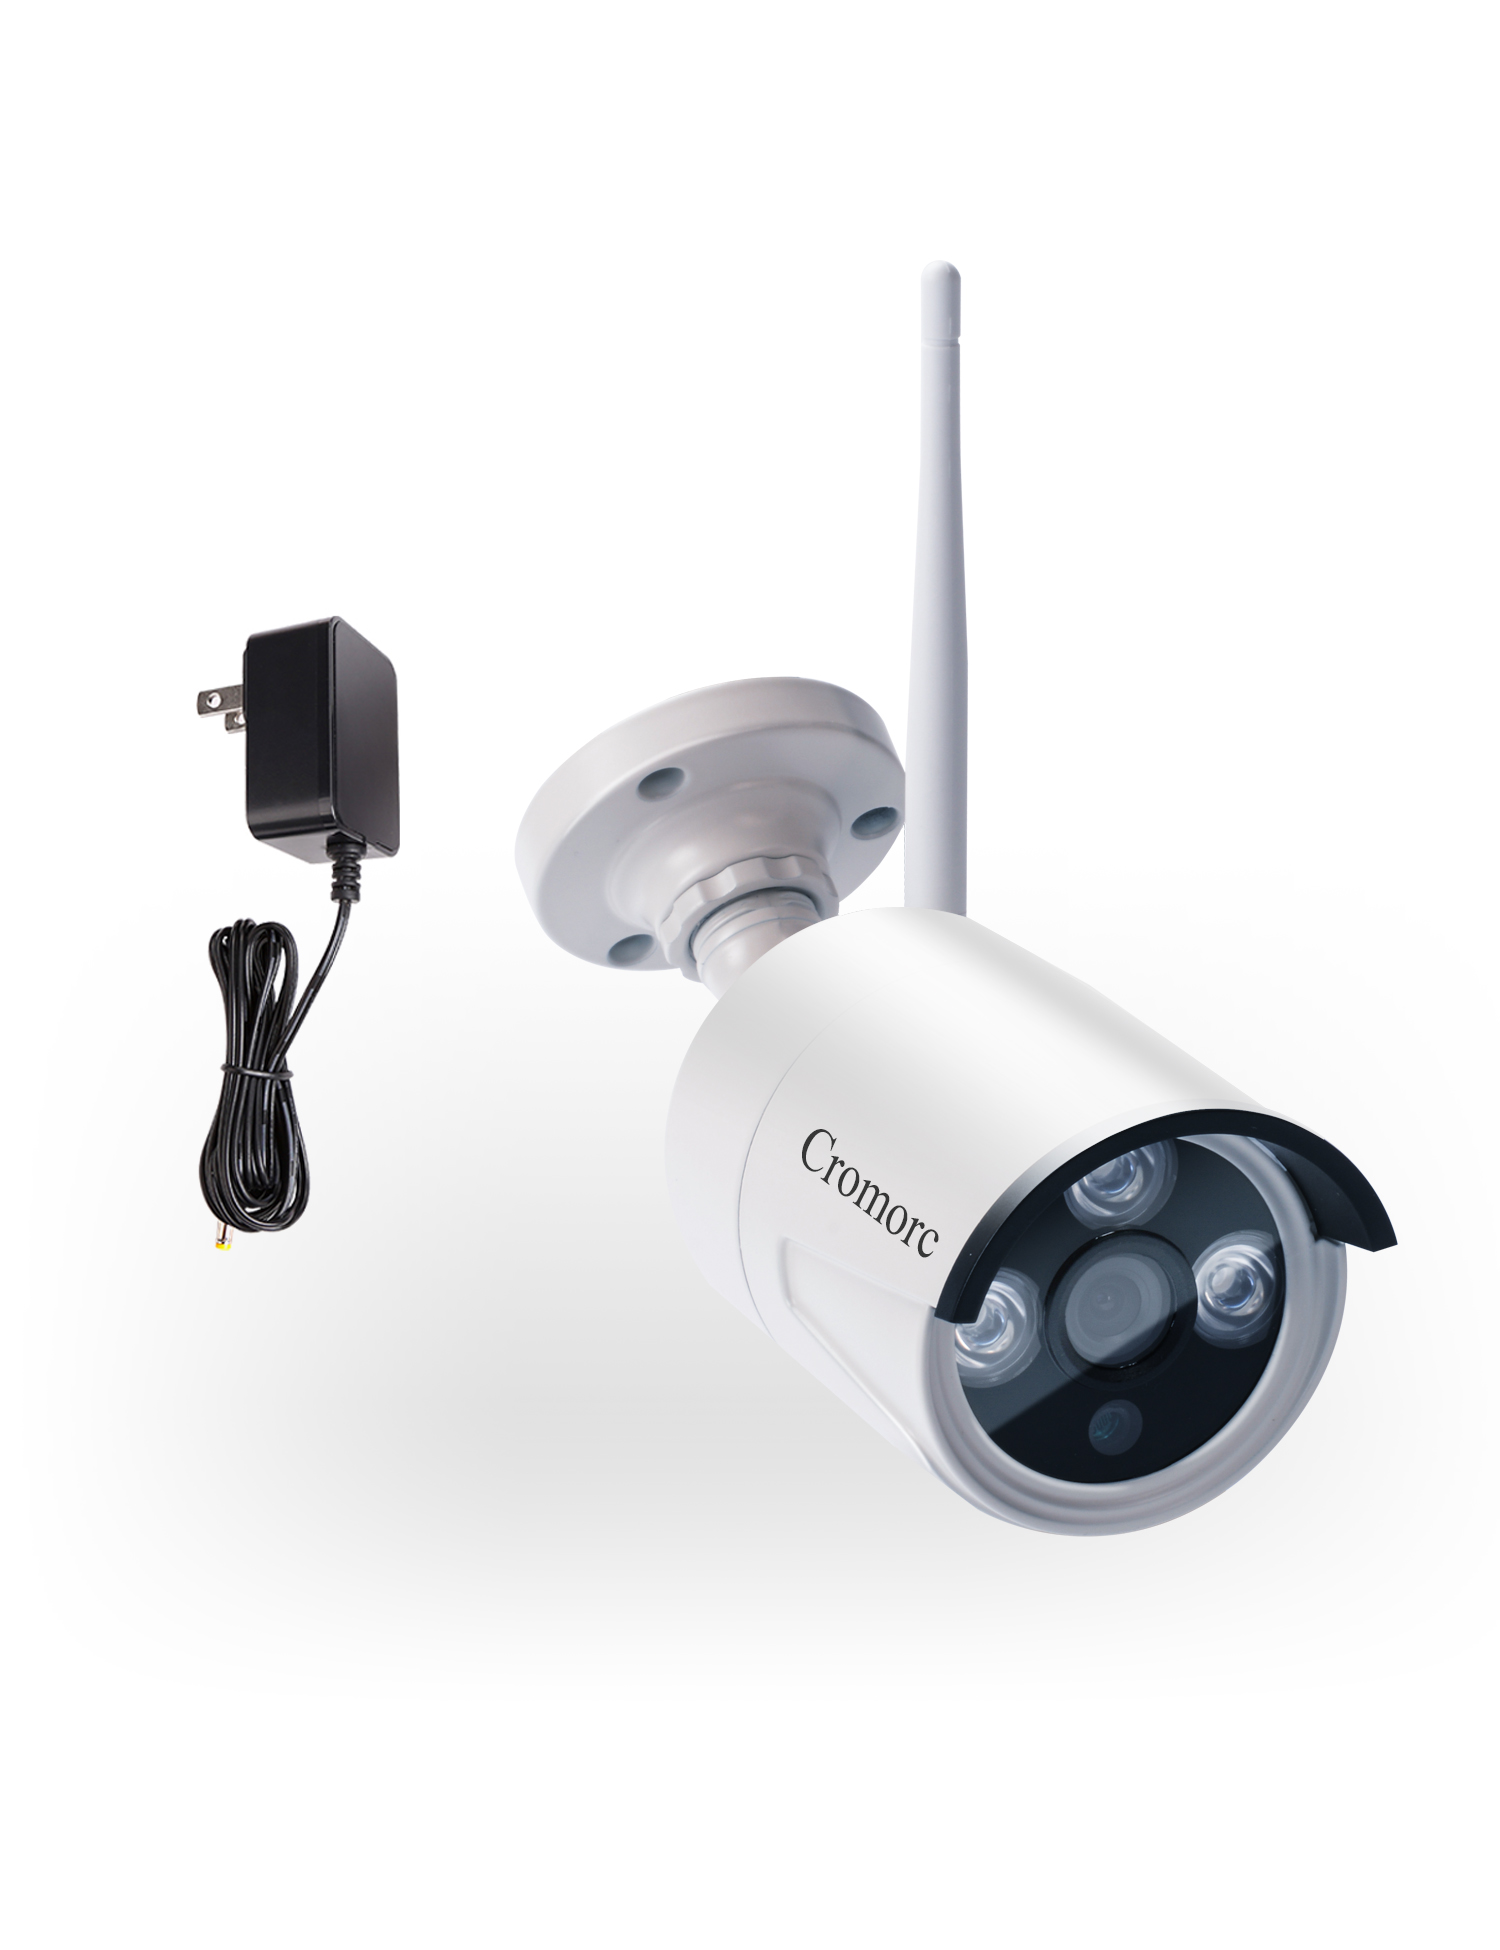
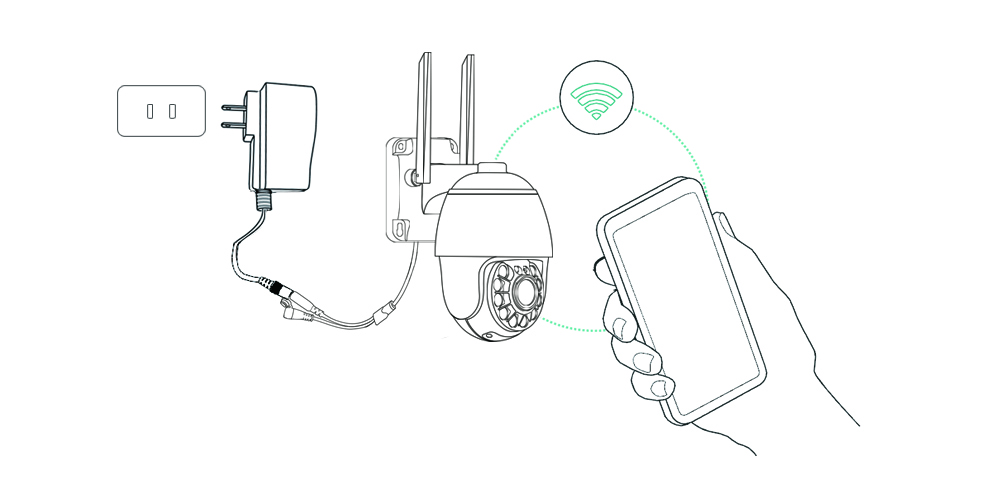
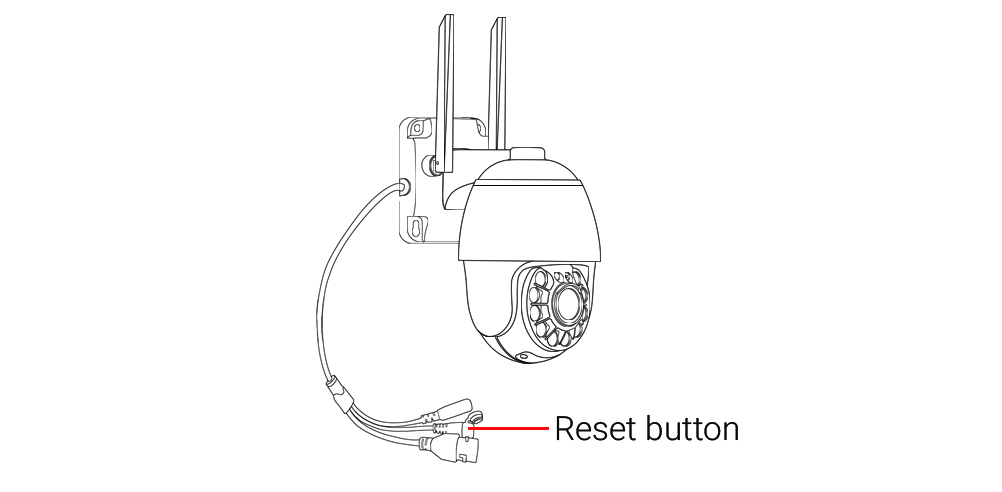
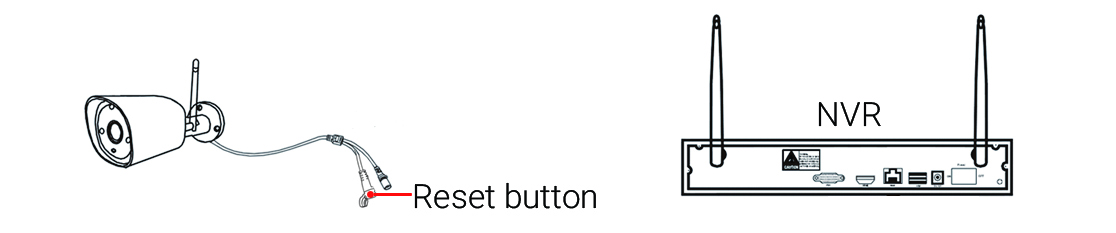
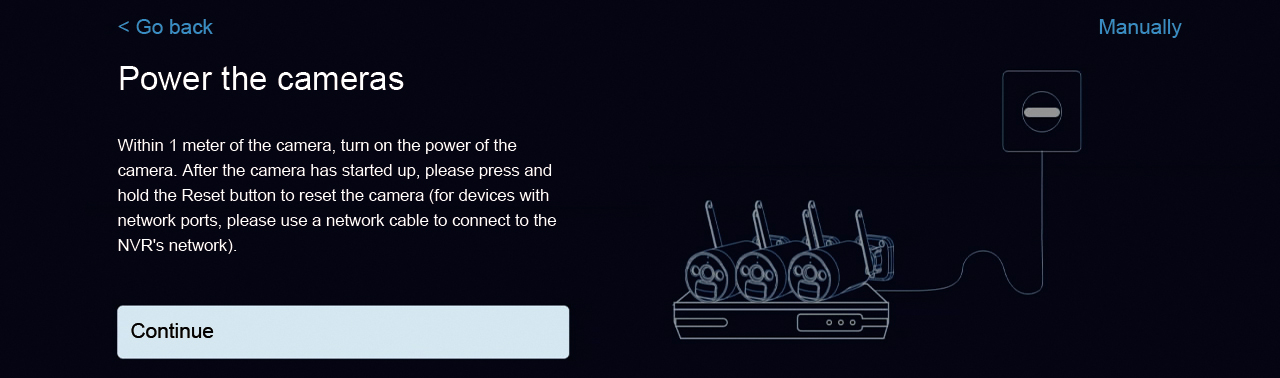
① Place the camera within approximately 3ft of the NVR, then power on the camera and NVR, press and hold the camera “Reset” button for 6-8 seconds to reset the camera.
② Log in to NVR, the Cromorc camera system has two different types of User Interfaces, please select User Interface A or User Interface B based on your system for operation.
NVR User Interface A:
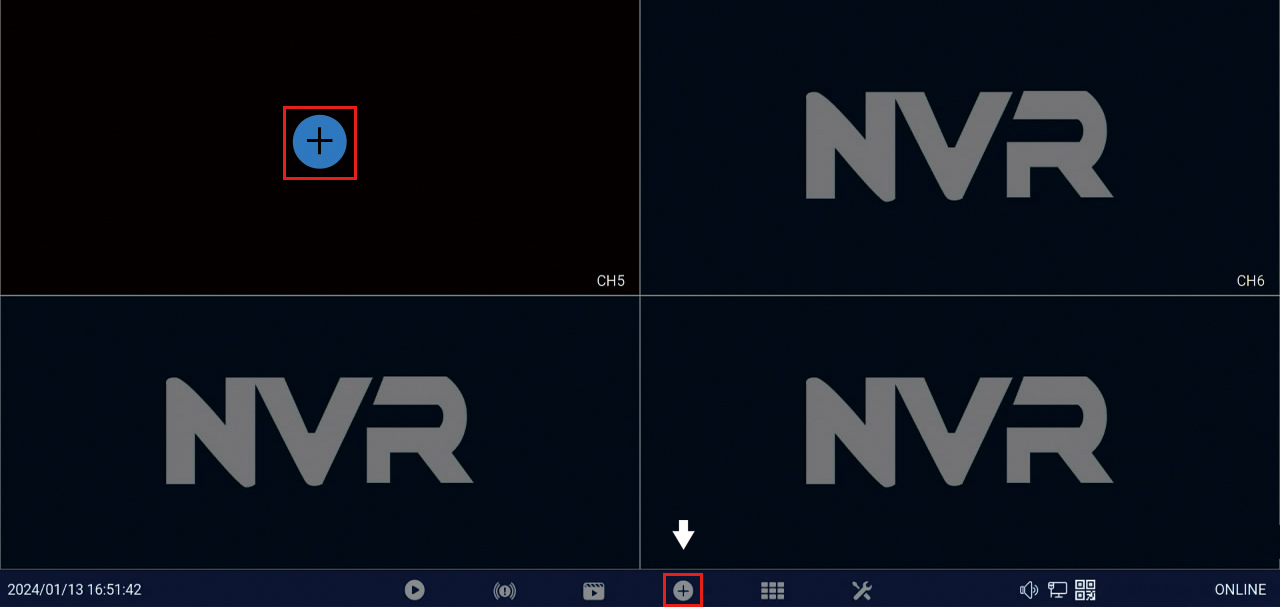
1. Move the mouse to a blank image area, then left click the “+” button, or left click the “+” button in the shortcut button bar at the bottom of the screen.
2. Left click “Continue” to start searching for cameras.
3. After about one minute, the successfully added camera will be displayed in the list on the right, with an IP address starting with 172 and a status indicating "Connect success".

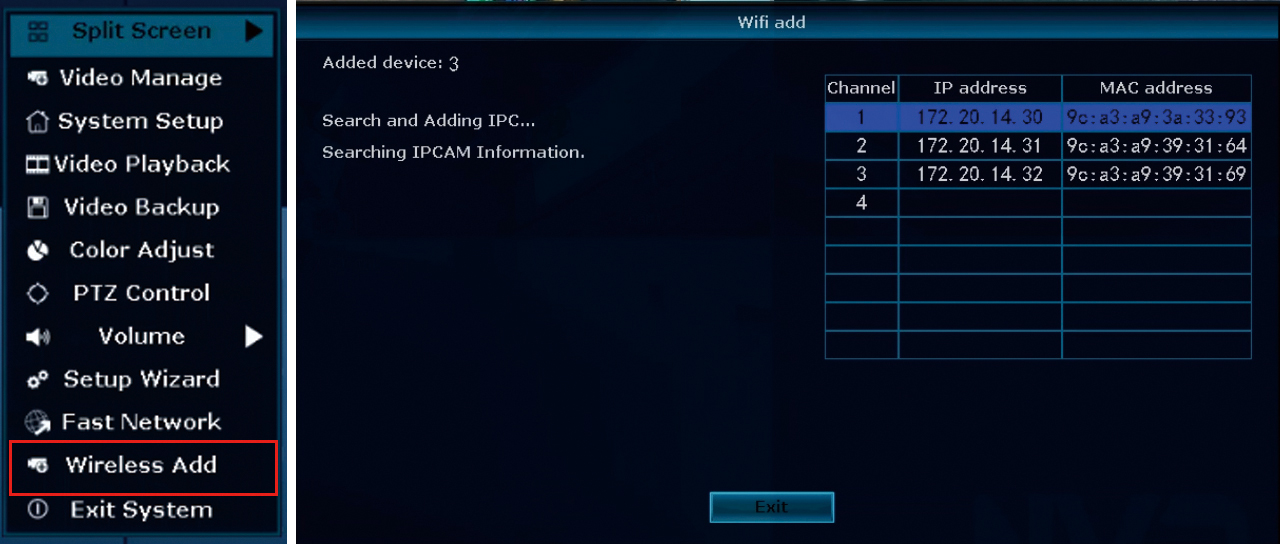
NVR User Interface B:
1. Right click the mouse on the screen, then left click “Wireless Add”.
2. After about one minute, a indicating "Added successfully" on the left, the successfully added camera will be displayed in the list on the right with an IP address starting with 172. Then left click “Exit”.

![[8CH,Expandable] All in one with 10.1](/uploads/image/3E2-2-01.jpg) [8CH,Expandable] All in one with 10.1" Monitor Wireless Security Camera System, Cromorc Home Business CCTV Surveillance 1080P NVR, 4pcs 3MP Indoor Outdoor Night Vision One-Way Audio Camera,1TB HDD
[8CH,Expandable] All in one with 10.1" Monitor Wireless Security Camera System, Cromorc Home Business CCTV Surveillance 1080P NVR, 4pcs 3MP Indoor Outdoor Night Vision One-Way Audio Camera,1TB HDD
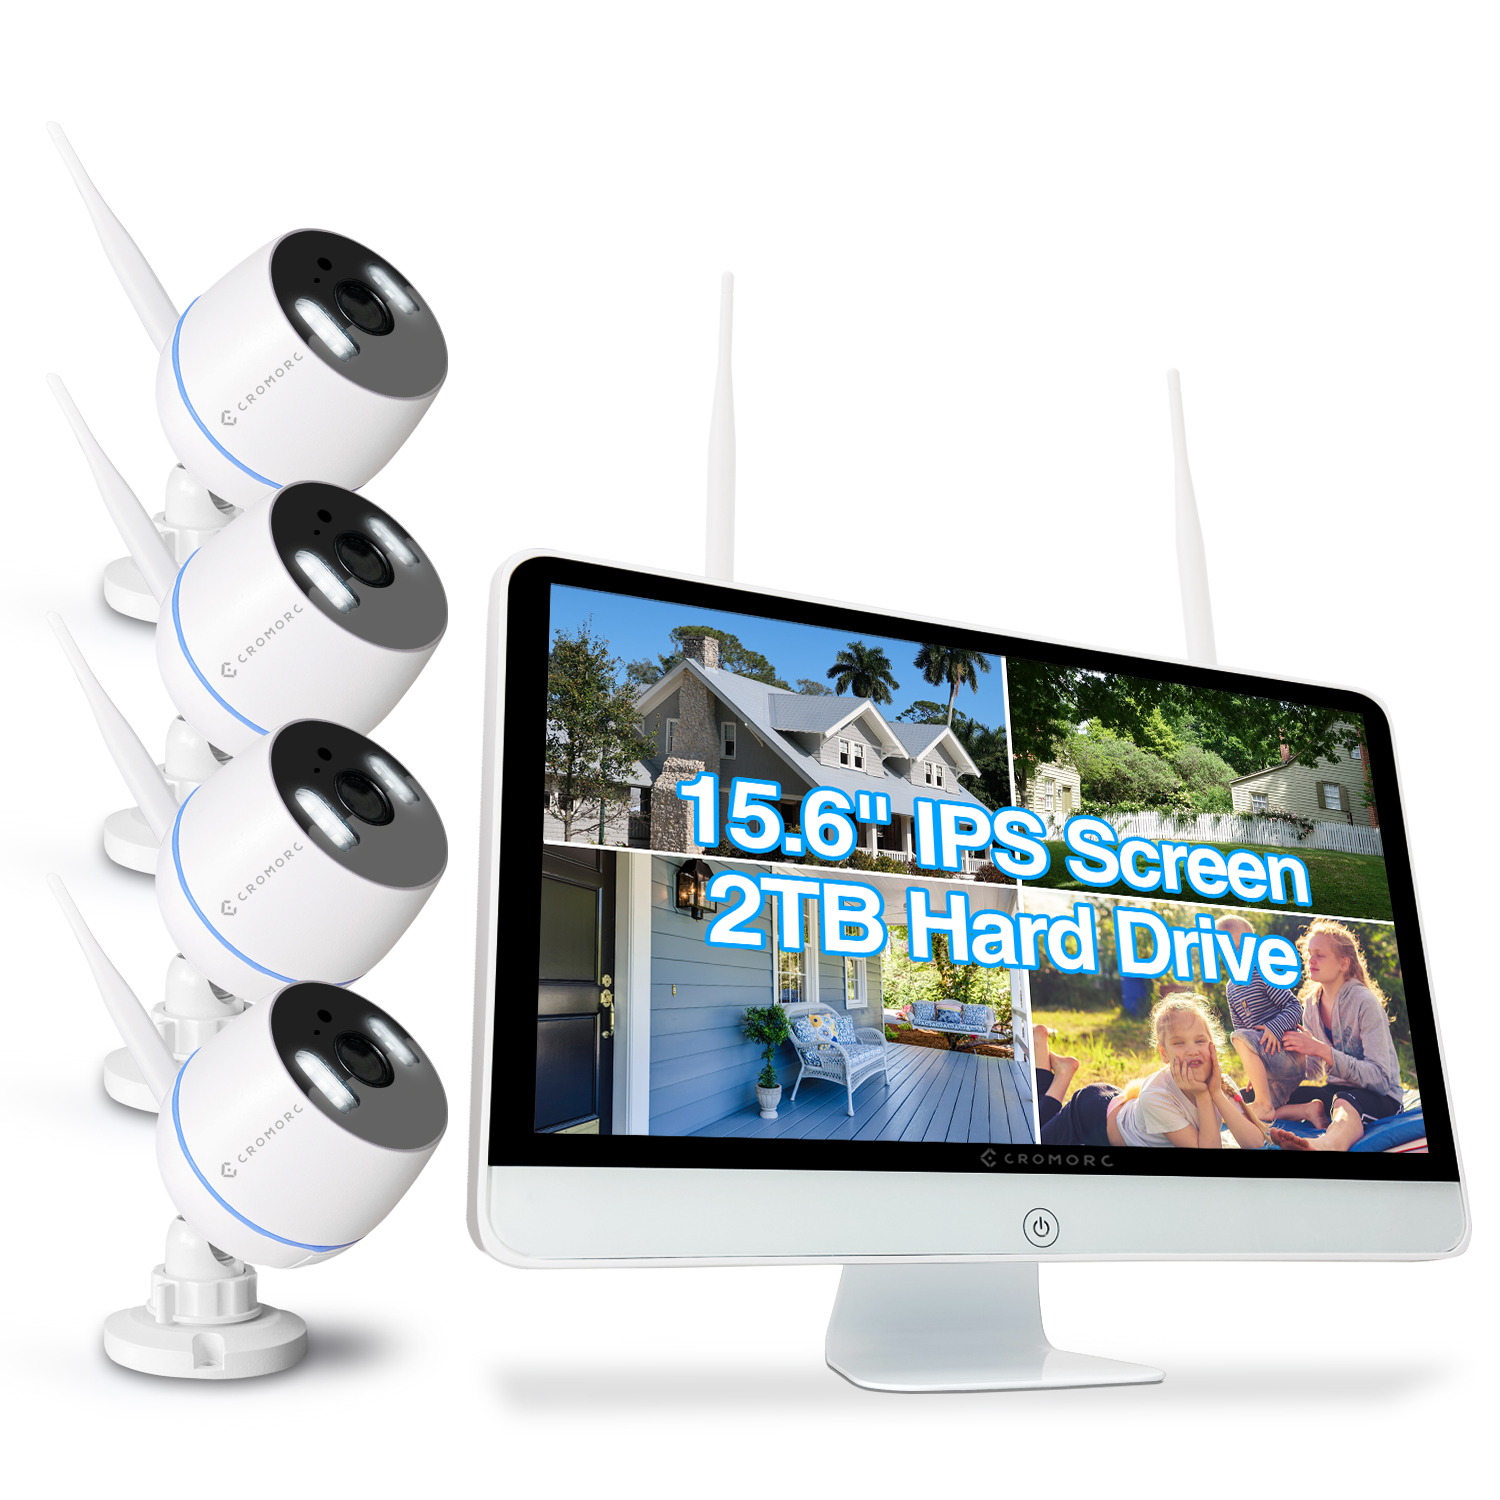 Cromorc All-in-one Wireless Security Camera System with 15.6" IPS Monitor, AI Human Detection, Floodlight,Siren Alarm, 2-Way Audio,4PCS 3MP Camera,Expandable 8CH NVR,Home Business Surveillance,2TB HDD
 Cromroc All-in-one Wireless Security Camera System with 12" Monitor, AI Human Detection, Floodlight,Siren Alarm, 2-Way Audio, 4PCS 3MP Camera, Expandable 8CH NVR,Home Business Surveillance, 1TB HDD
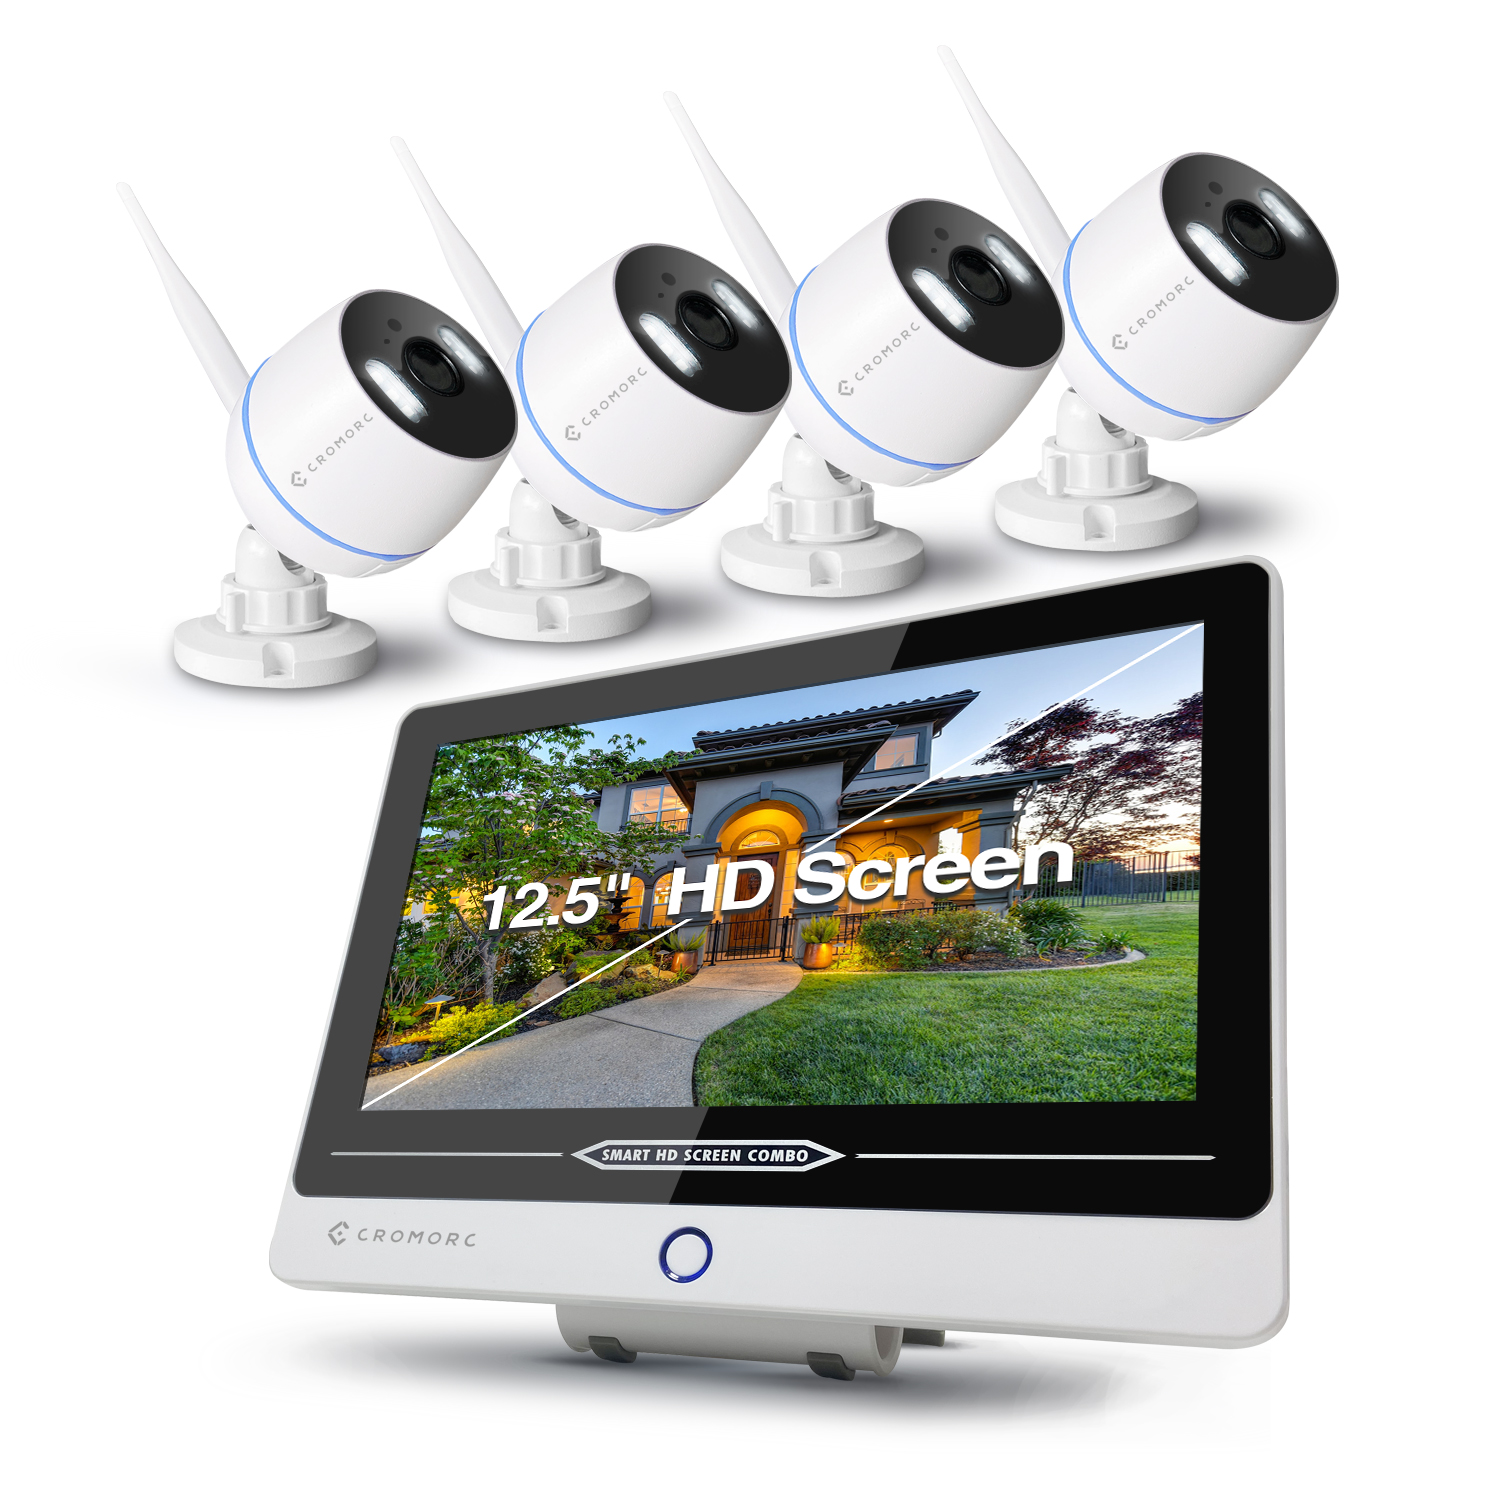
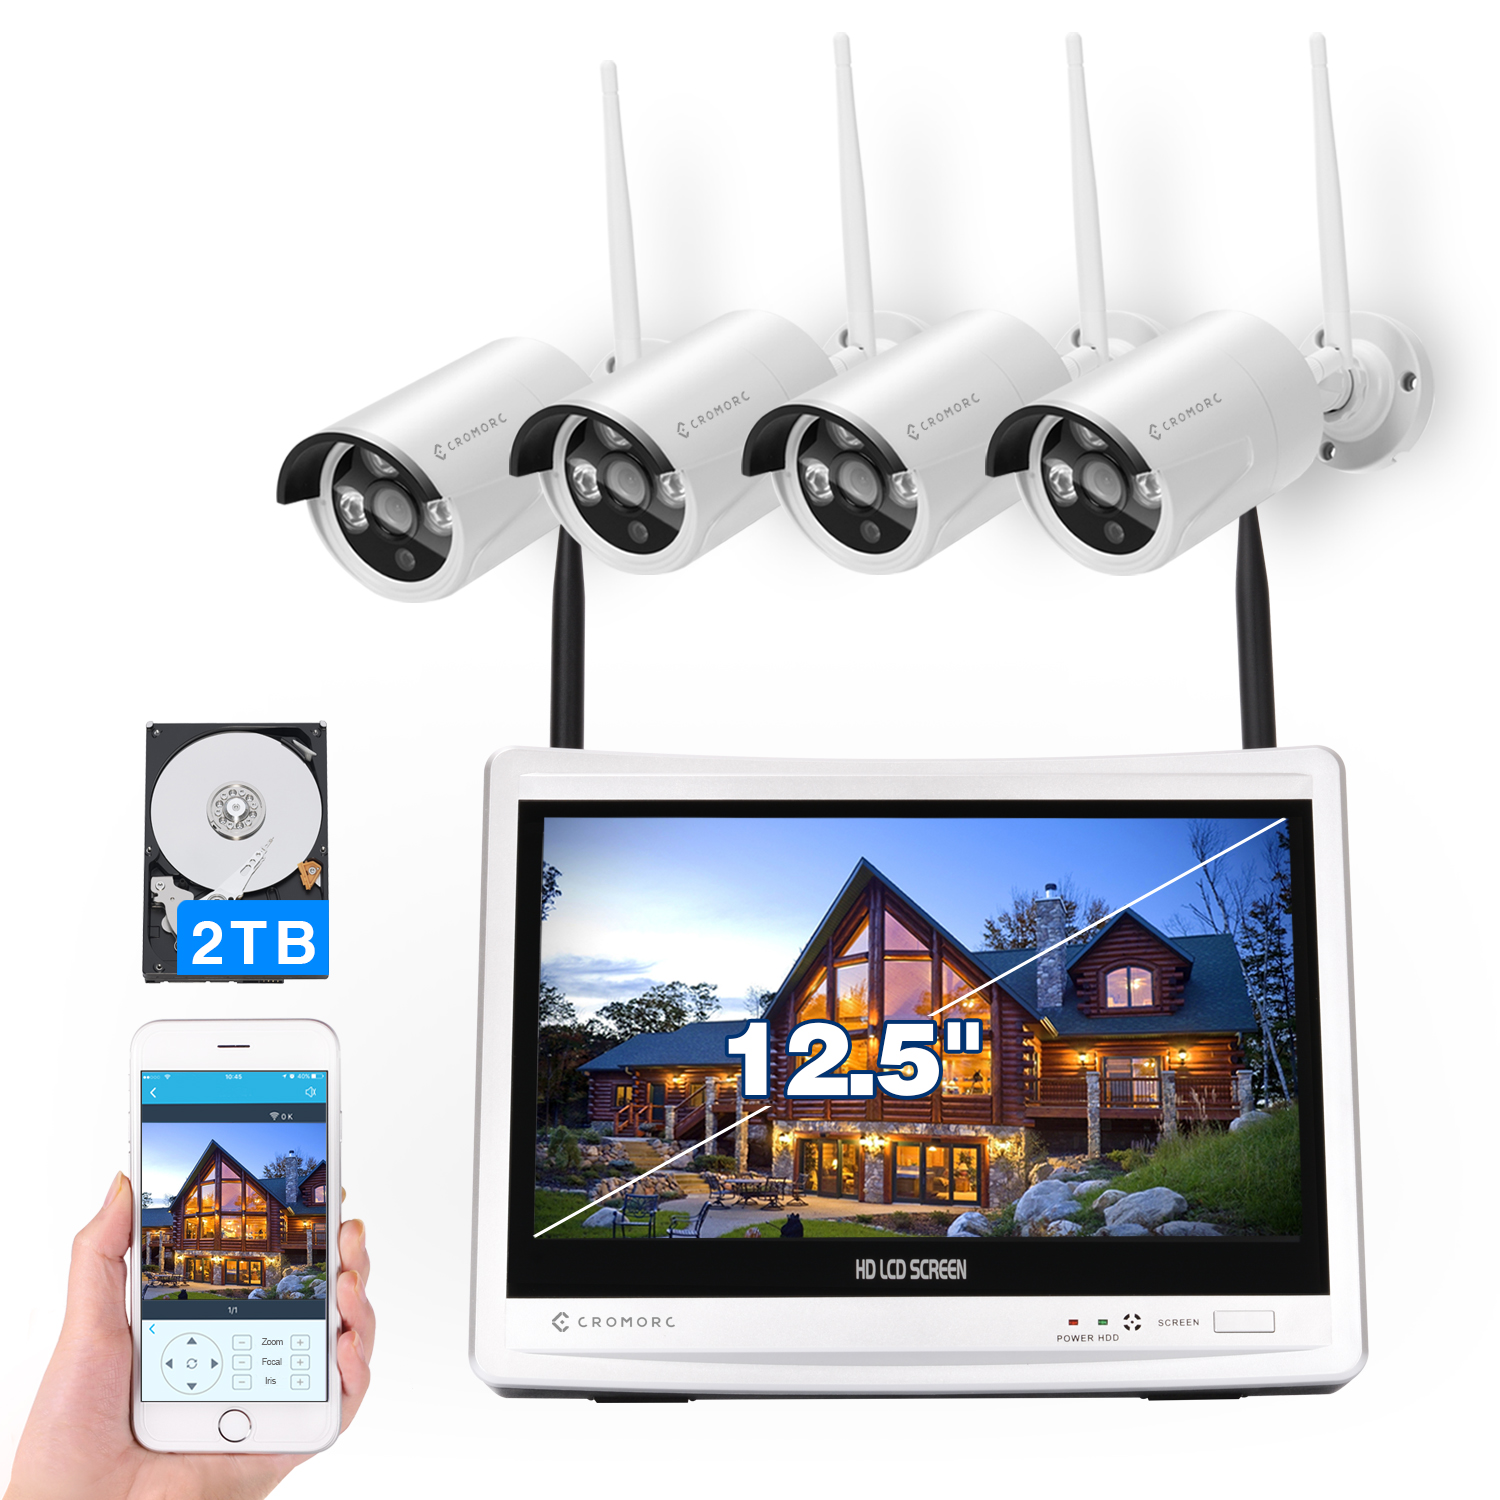 Wireless Security Camera System 12.5" Monitor,Home Business Surveillance Expandable 10CH NVR,4pcs 5MP Outdoor Indoor Night Vision 1-Way Audio Camera,Human Detection 3TB HDD