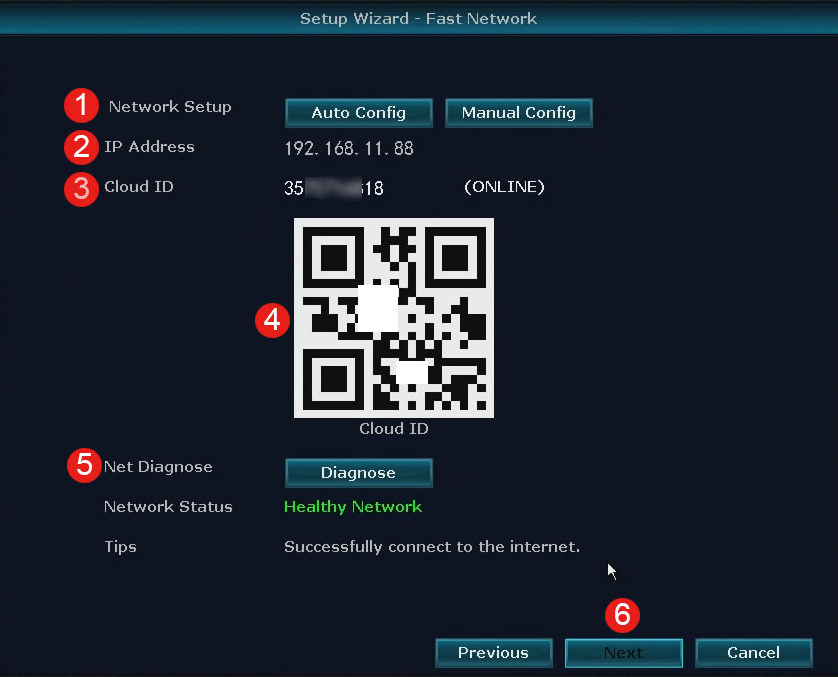
9. Network Setup
Network Setup: Allows users to connect the NVR to Internet for remote access.
Right click mouse on the screen to enter the Menu Bar, left click System Setup, then enter Network Setup main interface, left click Network Setup.
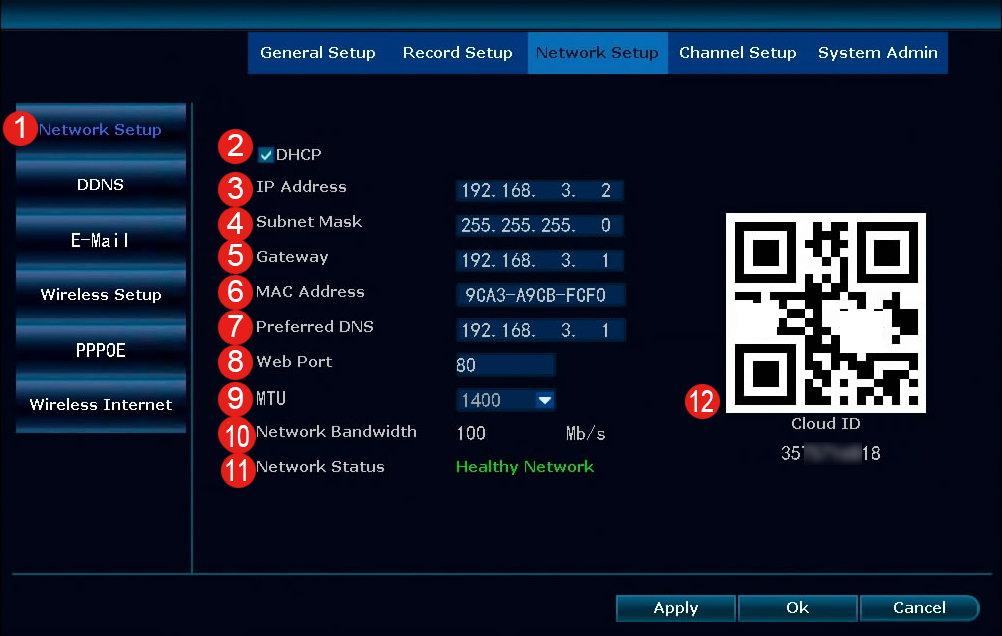
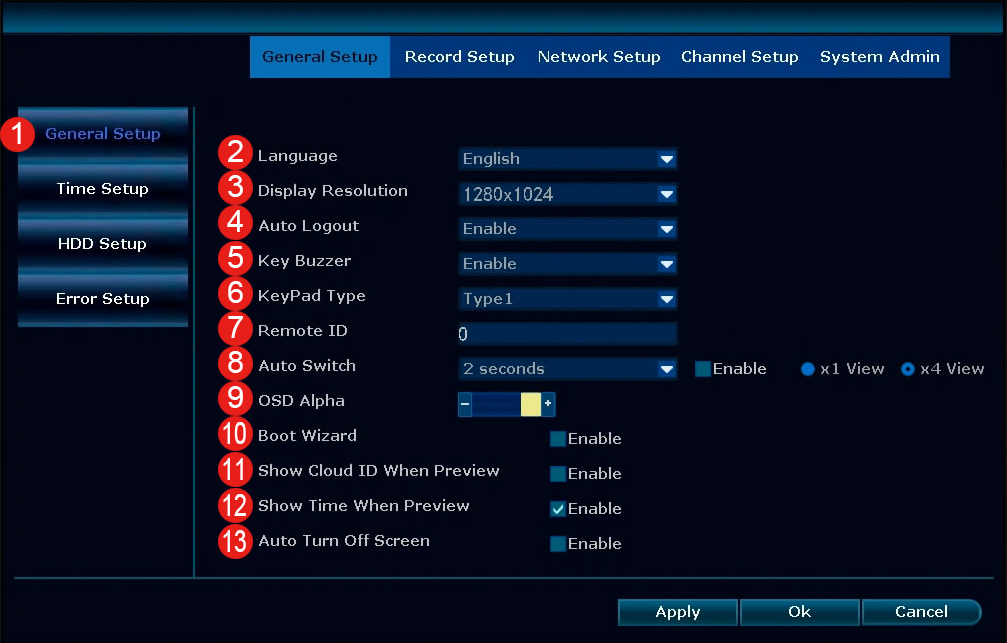
① Network Setup
② DHCP: Gathers the network values automatically from DHCP server. If unchecked it the values can be set manually.
③ IP Address: Network address of the connected NVR.
④ Subnet Mask: The range of IP addresses that can be found in the network. This should always be set to the default address 255.255.255.000.
⑤ Gateway: The connection between two networks. This should always be the IP address of the connected router.
⑥ MAC Address: The unique identifier assigned to network interfaces for communications at the data link layer.
⑦ Preferred DNS: Domain Name System server address
⑧ Web Port: Allows access to your NVR with LAN or the Internet.
⑨ Network Bandwidth: Defines channel capacity, or the maximum throughput of the network interface.
⑩ Network Status: Shows status of the network connectivity.
DDNS: If the device does not have a fixed access address, using DDNS (Dynamic Domain Name Resolution) to access the device through the domain name can effectively solve the trouble caused by the dynamic IP to access the device.
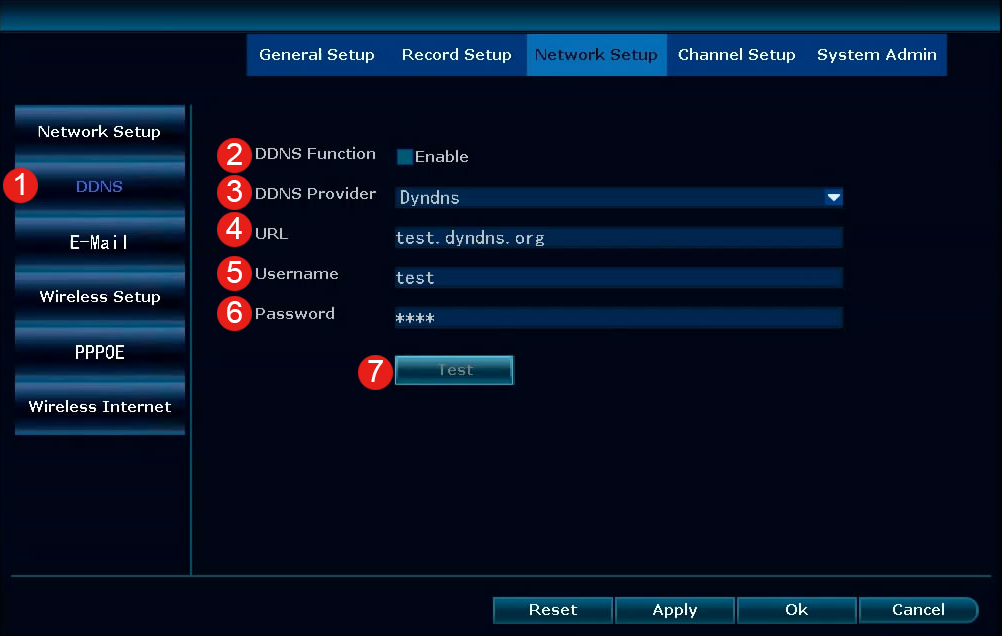
① DDNS
② DDNS: Enable or disable the usage of the DDNS service on the NVR.
③ DDNS Provider:Currently supports 3322, changeip, no-ip, dyndns, oray, DVR163。
④⑤⑥⑦ Fill in the domain name, user name and password information, then Tests to ensure the configuration set is correct。
Used to notify users of alarm and video detection results by email。

① E-mail
② E-Mail Function: Check the checkbox to enable the E-MAIL function.
③ SMTP Provider :Choose an SMTP service provider.
④⑤ Sender Password: Enter the sender's E-mail and E-mail password.
⑥ Test:Test whether the setup is successful.
⑦ More Parameter: Check the checkbox to show more parameters.
⑧ SMTP Servier:The SMTP service provider selected in the third step will display the corresponding SMTP server.
⑨ Port:The default is 25, you can also try to fill in 465,587.
⑩ Encryption Type:The default is None, but if testing fail, please change to TLS.
⑪⑫ Sendee: Enter sendee's E-mail, can be the same as the sender.
⑬ Edit the subject of the email you received.
⑭ Time interval for receiving E-mail.
⑮ The time interval between emails sent when the machine is running.
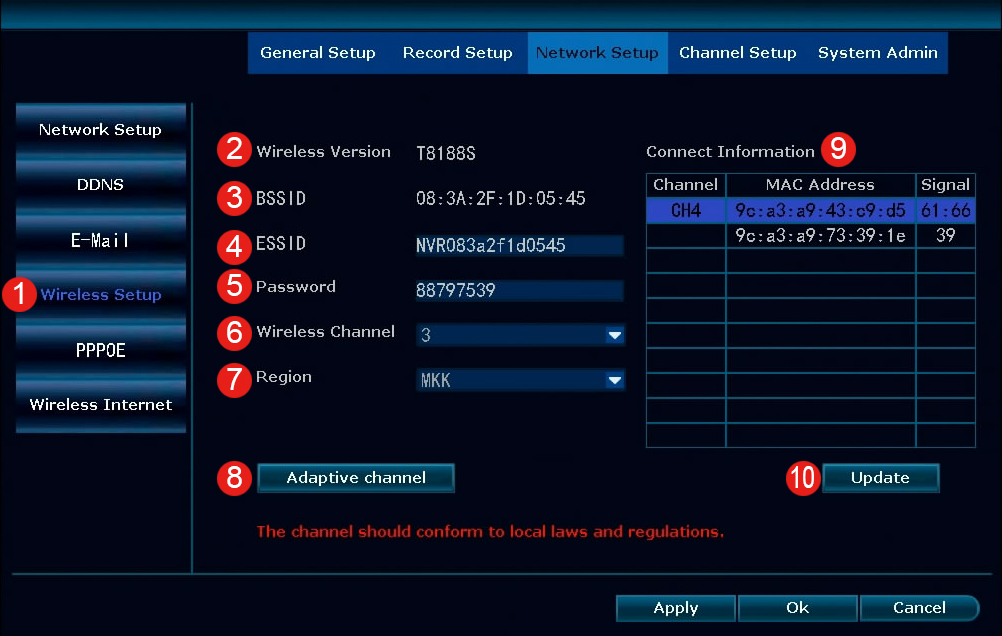
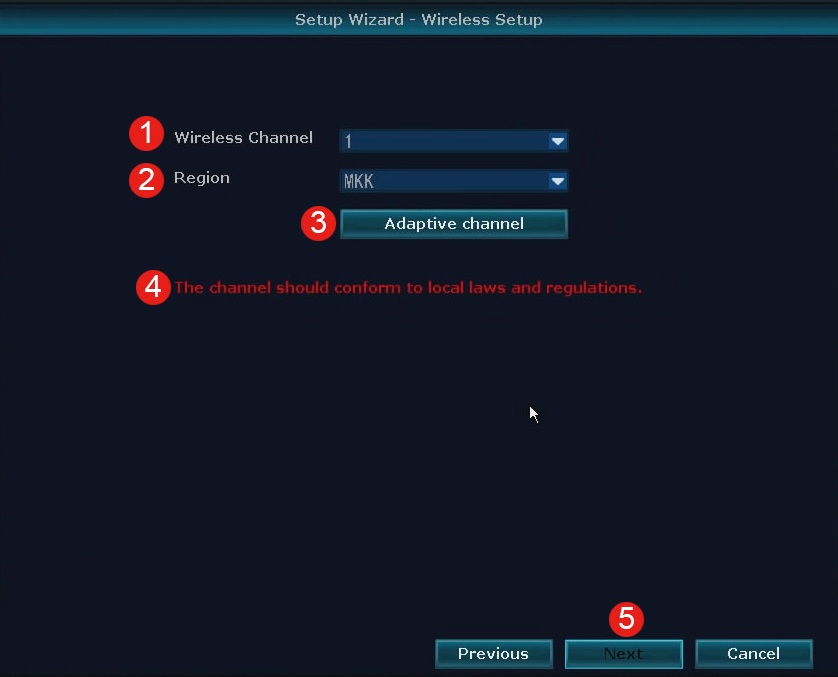
① Wireless Setup
② Wireless Version
③ BSSID: The MAC address of the wireless device, if the MAC address cannot be read, it means that the hardware cannot recognize the wireless module.
④ ESSID: NVR WiFi account.
⑤ Password: NVR WiFi password.
⑥ Wireless Channel: The wireless channel that transmits the signal, if the environmental interference is large, you can try to change the channel, 1/6/11 is recommended.
⑦ Region: There are corresponding wireless channels in different areas.
⑧ Adaptive channel: The system chooses the appropriate channel.
⑨ Connect Information: Information of the wireless device currently connected to the NVR.
⑩ Update the currently connected wireless device information.
PPPOE: Support dial-up Internet access function
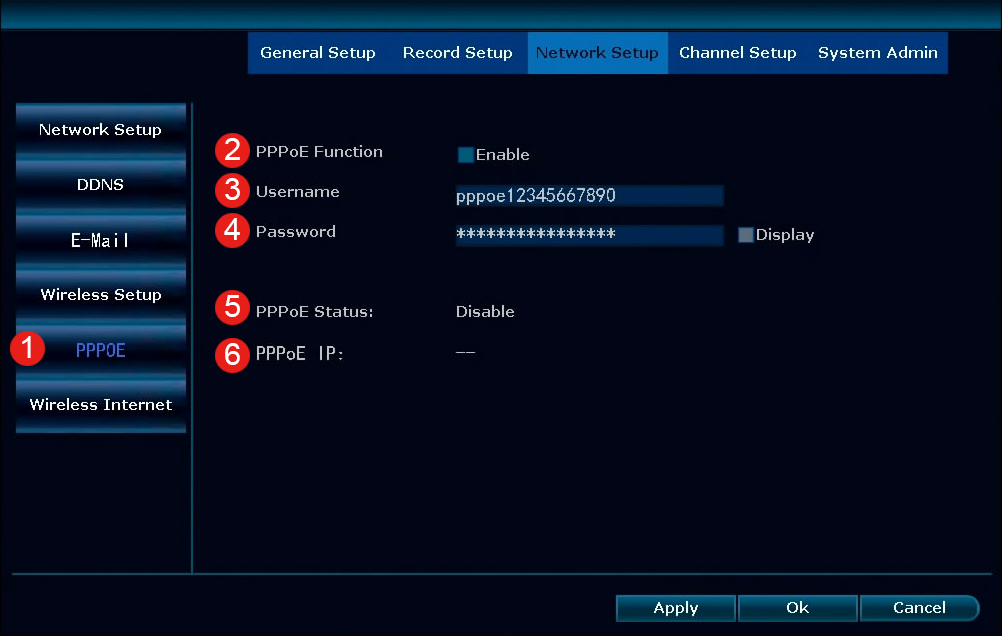
① PPPOE
② PPPOE Function: Check the checkbox to enable the PPPOE function.
③④ Enter the username and password provided by the ISP.
⑤⑥ When the connection is successful, the status and IP Address of PPPOE are displayed here.
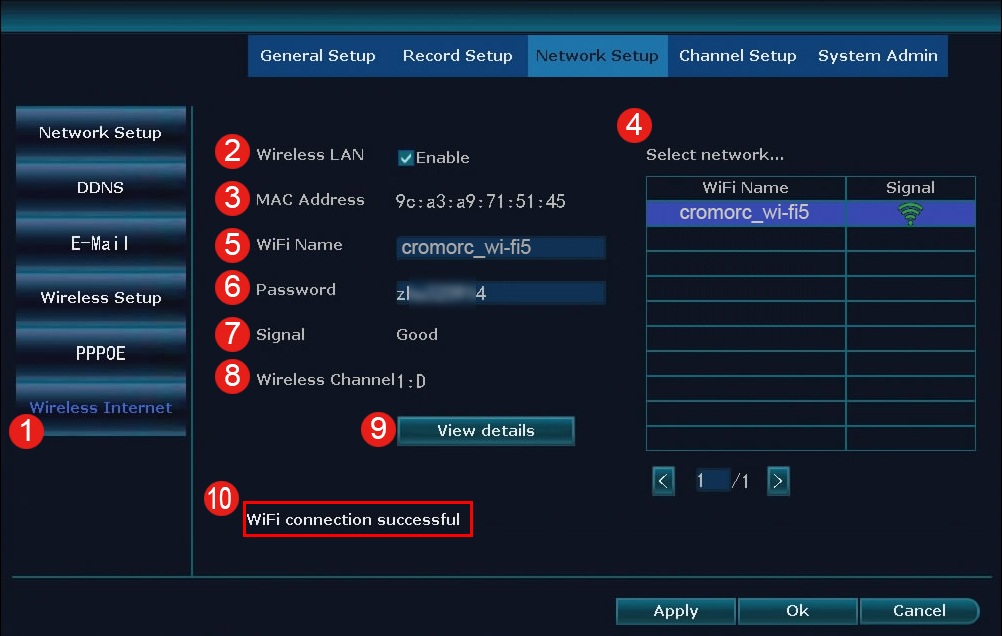
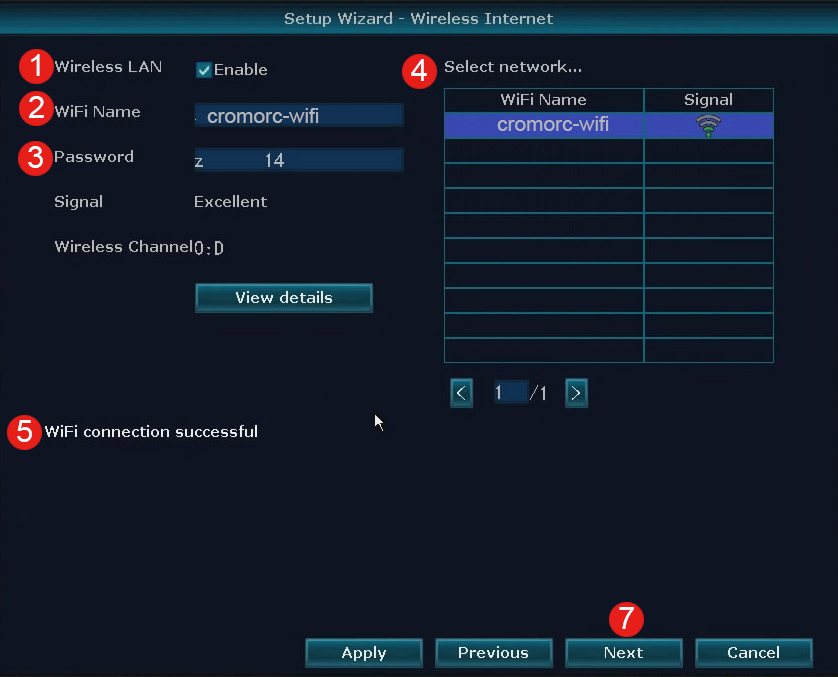
① Wireless Internet
② Wireless LAN: Check Enable checkbox to enable WIFI to connect to the router(internet).
③ MAC Address: Display the MAC Address of the NVR.
④ Select netword: Choose available WIFI.
⑤ Wifi Name: Fill in the WIFI name that appears from the right column.
⑥ Password: Fill in your wifi password.
⑦ Signal: Display signal strength.
⑧ Wireless Channel: Show used wireless channel.
⑨ View details:The IP address, gateway, DNS of the network connected via WIFI, allowing you to obtain it automatically or set it manually.

![[10CH,Expandable] All in one with 10.1](/uploads/image/3E2-2-01.jpg) [10CH,Expandable] All in one with 10.1
[10CH,Expandable] All in one with 10.1
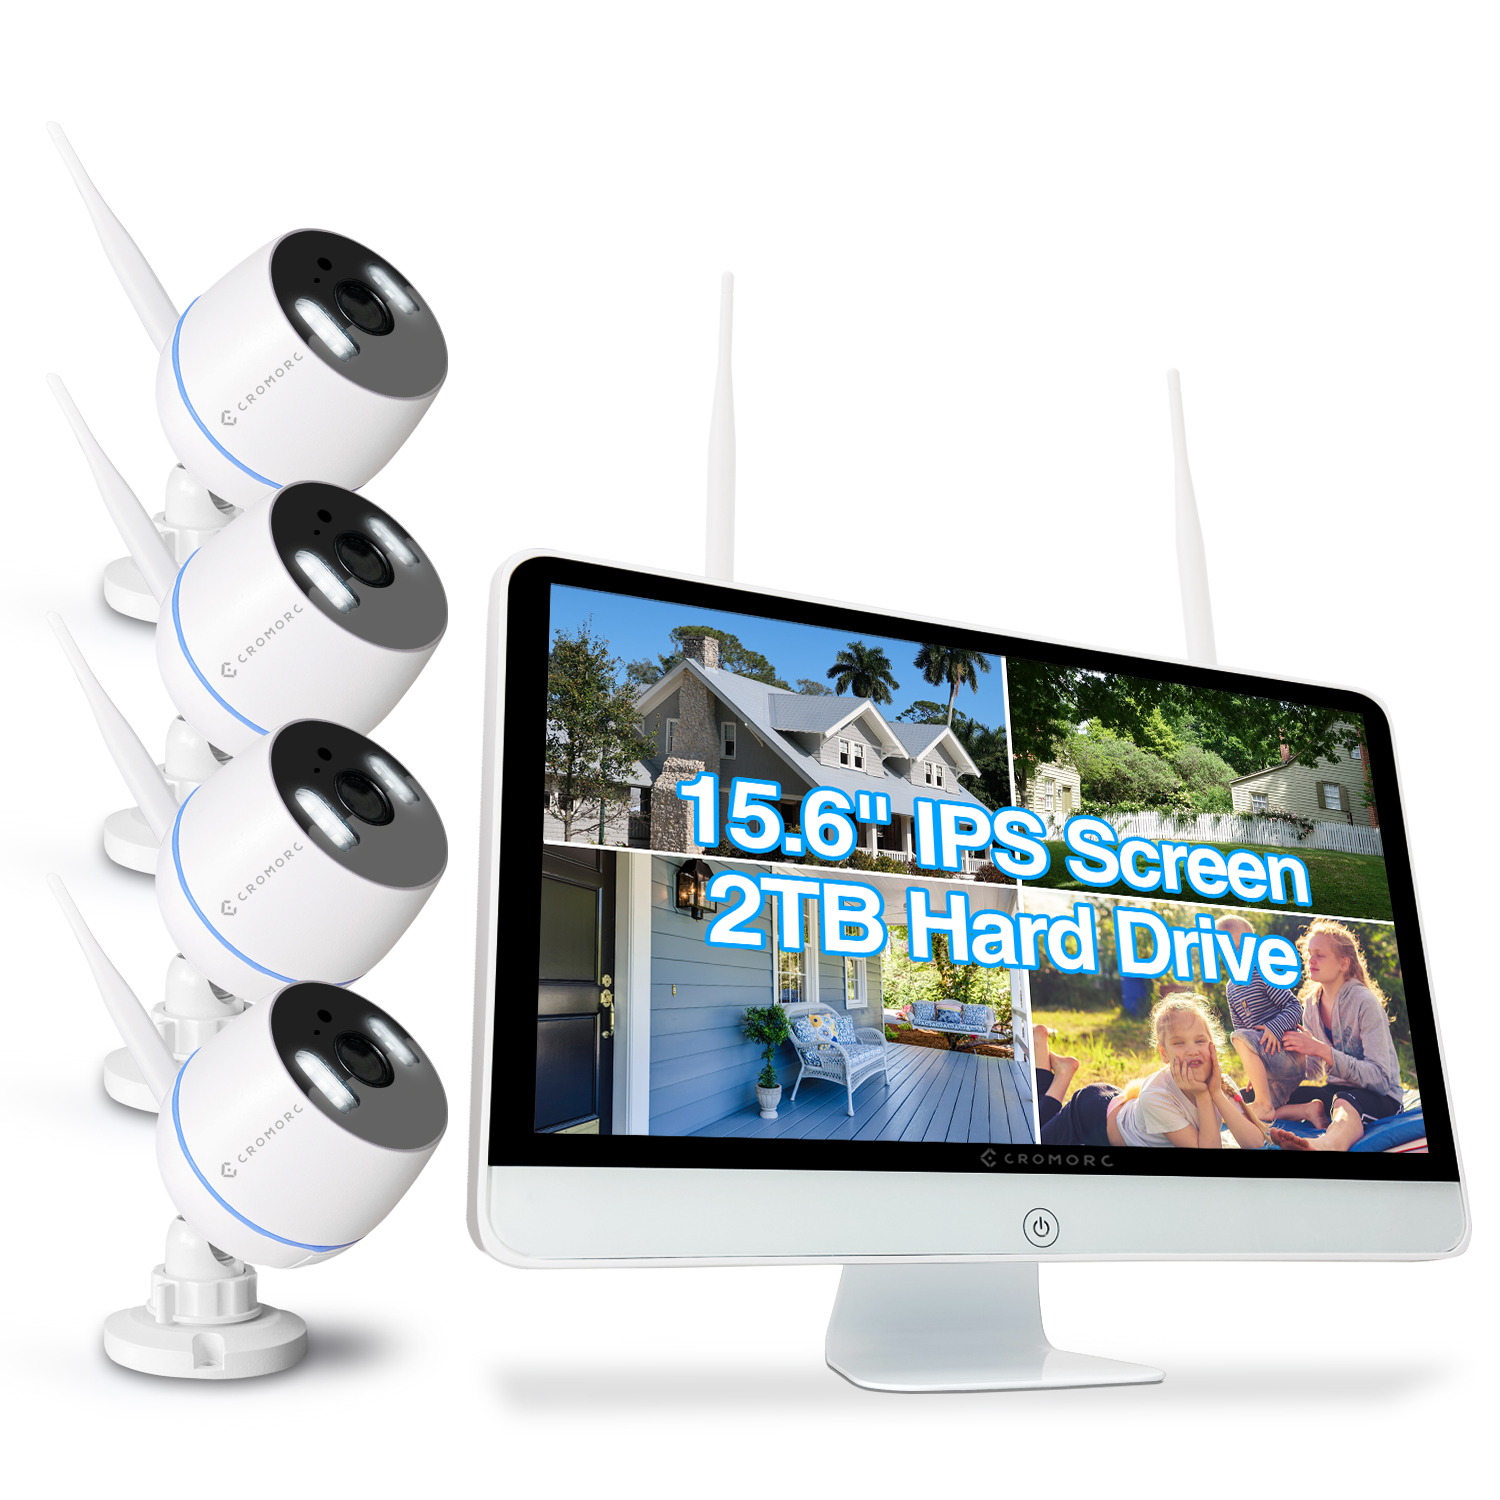 Cromorc All-in-one Wireless Security Camera System with 15.6" IPS Monitor, AI Human Detection, Floodlight,Siren Alarm, 2-Way Audio,4PCS 3MP Camera,Expandable 8CH NVR,Home Business Surveillance,2TB HDD
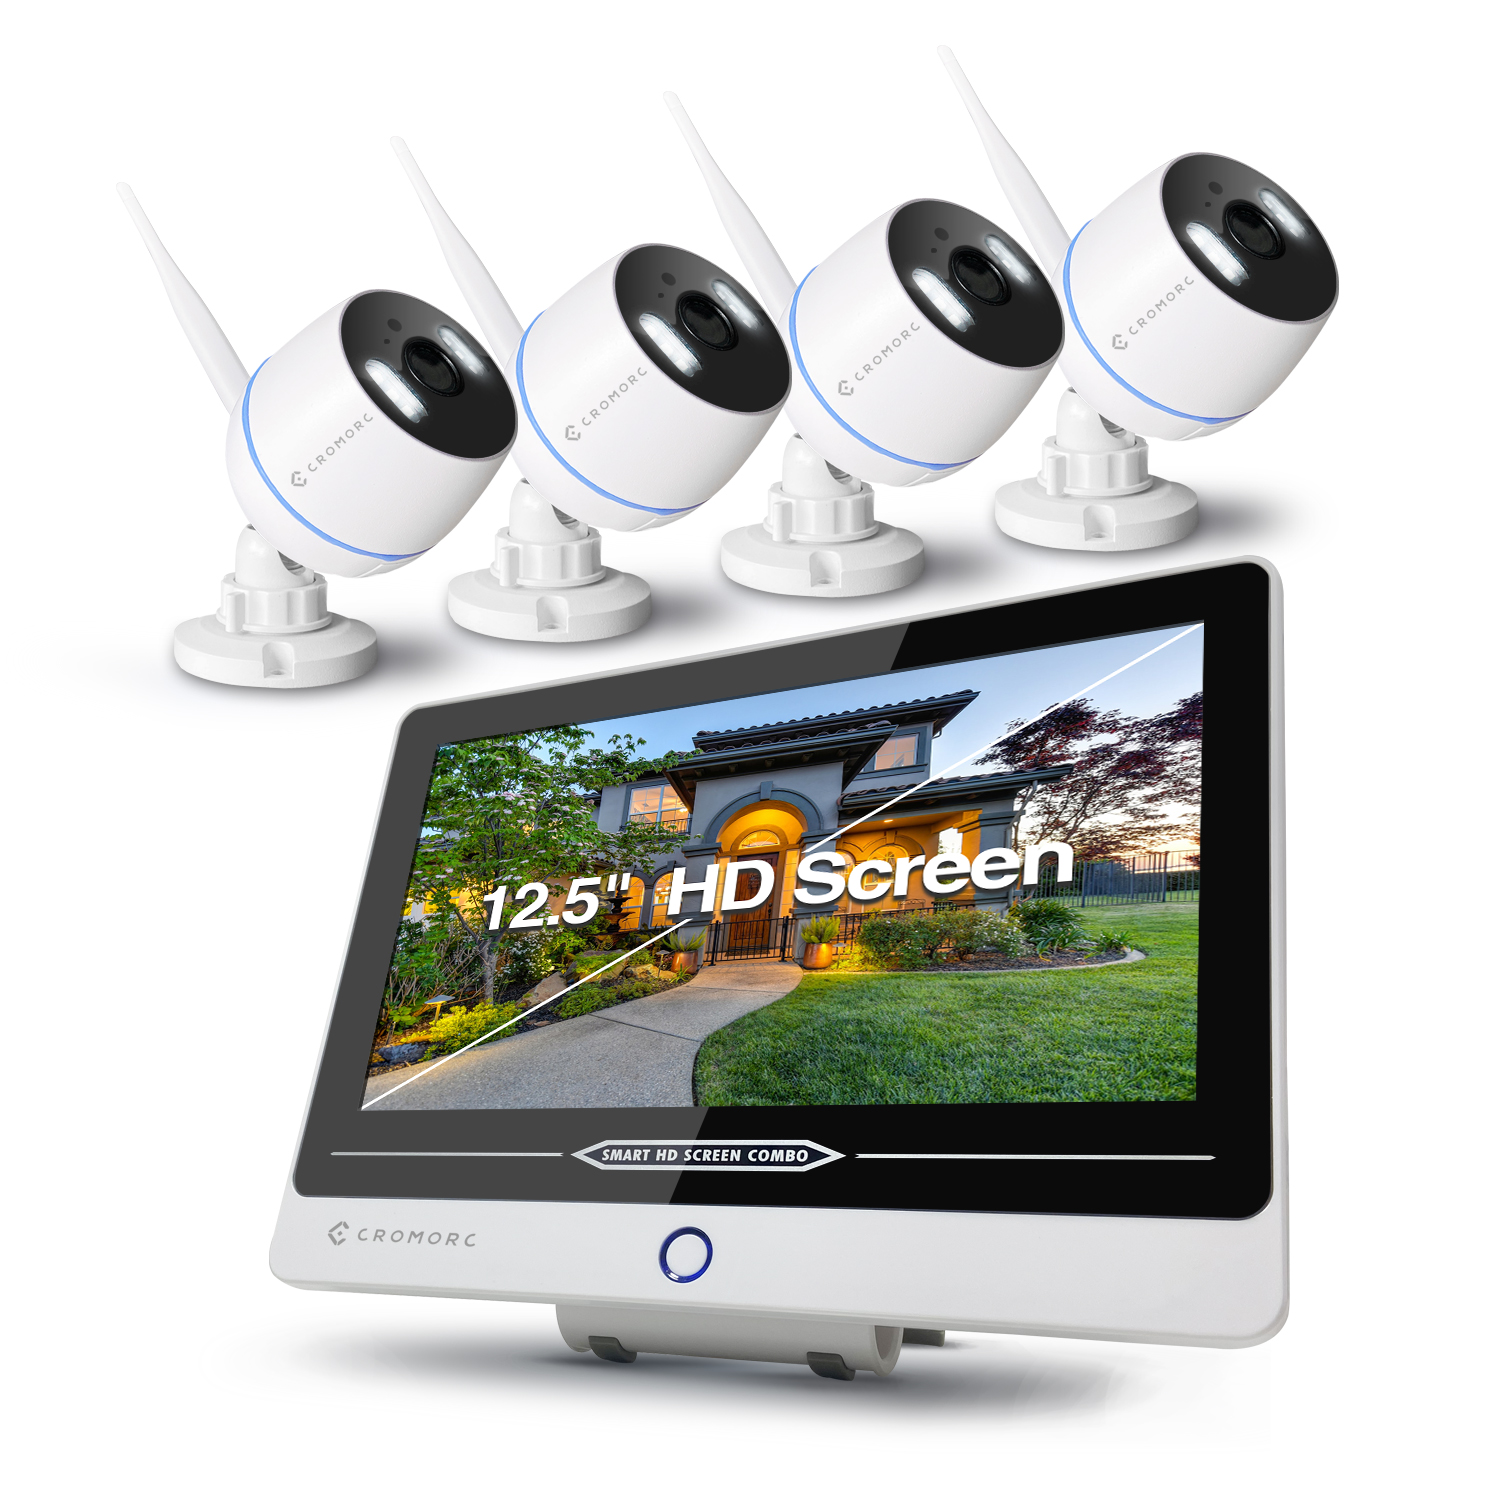 Cromroc All-in-one Wireless Security Camera System with 12" Monitor, AI Human Detection, Floodlight,Siren Alarm, 2-Way Audio, 4PCS 3MP Camera, Expandable 8CH NVR,Home Business Surveillance, 1TB HDD
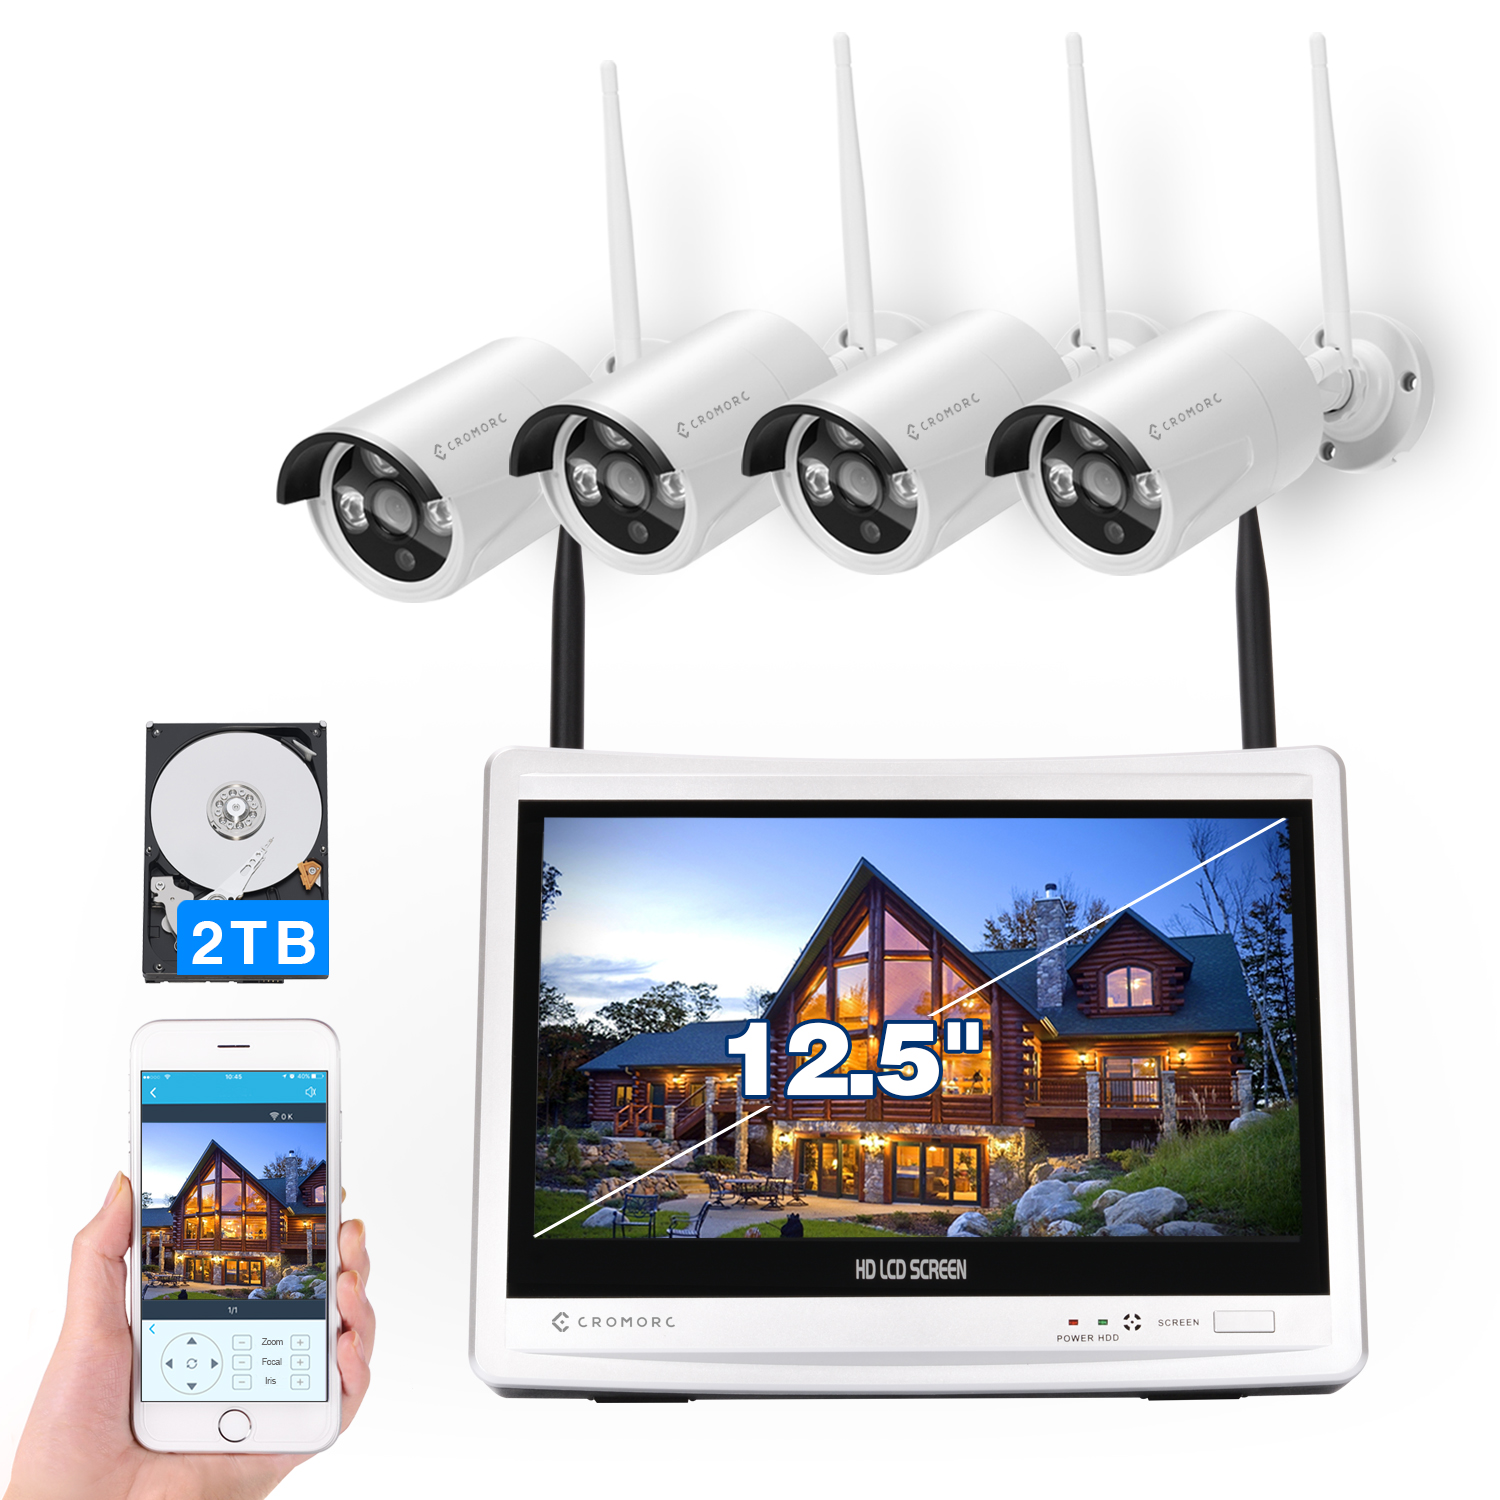 Wireless Security Camera System 12.5" Monitor,Home Business Surveillance Expandable 10CH NVR,4pcs 5MP Outdoor Indoor Night Vision 1-Way Audio Camera,Human Detection 3TB HDD